
To polish or not to polish – that is the question for many antique collectors. Knowing how to clean antiques can make or break cherished pieces. But is it always advisable to clean antiques? While cleansers can spruce up materials like wood, leather, silver and brass, cleaning may also shine away prized features. For instance, “patina” is a characteristic developed over time. Some antiques are better left untouched because it is this very patina that adds charm and value. Designers even use aging methods on newer items to create this sought-after character.
Whether the goal is to make antiques shine or maintain their natural appeal, this guide covers how to clean antiques and when not to:
Why do antiques lose their shine over time?
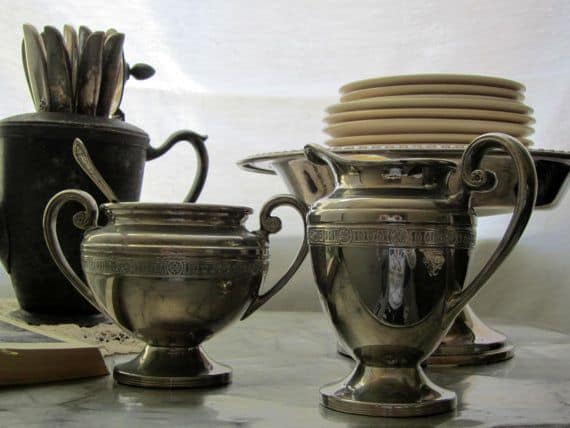
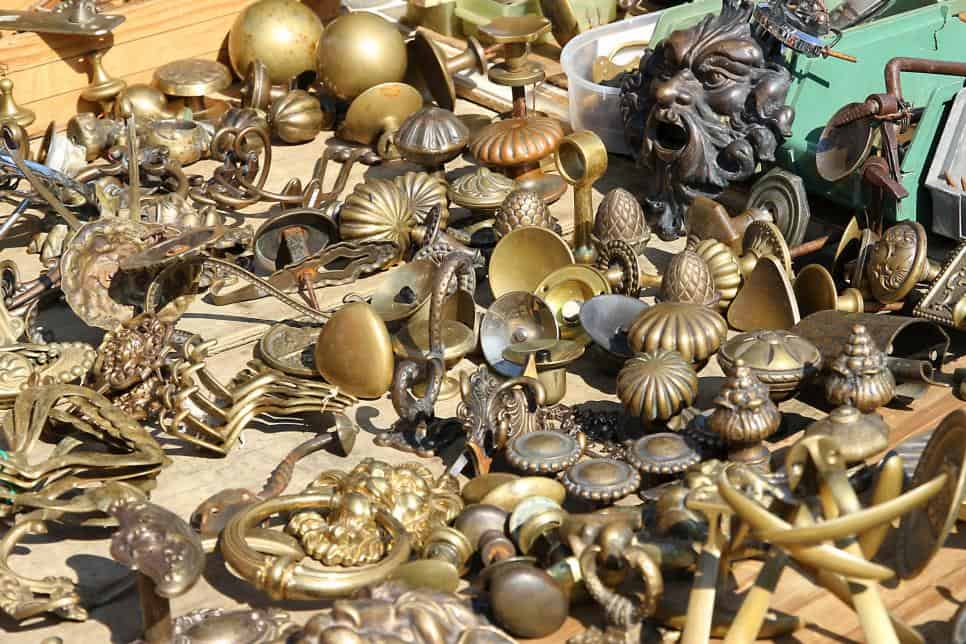
Beauty marks such as tarnish on metals and spots on mirrors can indicate an antique’s authenticity. Often, oxidation causes this green or black film commonly referred to as patina. Oxidation, simply, results from exposure to air. The longer materials such as silver, brass, copper, and cast iron are exposed to environmental elements, the more they collect patina and even rust. Accordingly, limit contact with air and humidity to minimize tarnish. Easy, right! Store silver pieces in anti-tarnish bags and airtight boxes when not in use. Or place sticks of schoolhouse chalk inside display cabinets to absorb sulfur and other filming gases. Since acids on the skin activate tarnish, wear gloves when handling objects.
Do some materials look better if left untouched?
Taking a hand’s off approach can be beneficial. Although techniques artificially age new pieces in minutes, antiques gather genuine patina over decades. Plus, it is near impossible to replicate the richness of earth tones like the greenish blues and golden hues formed on copper and bronze. Patina is not only a signature of older metals. Antique wood and leather age gracefully too. In fact, these materials acquire amber and honey shades that deepen their warmth and heirloom quality.
“With wooden antiques that have built up a ‘patina’ from being handled and used over long periods of time, take great care not to remove this surface effect as that will be highly desirable to a buyer in the future,” says Mark Hill, Member of The British Antiques Dealers’ Association, Head of Design at Dawsons Auctions, and EU & UK Director at RONATI. “This is particularly true of ‘treen’, small utilitarian and functional wooden pieces for the home made from the 16th to early 20th century. Removing this ‘good wear’ can reduce the desirability and value of a piece of treen (and indeed furniture with great colour and patina) dramatically.”
How to decide which antiques to clean?
When it comes to cleaning, identify an antique’s purpose. It is okay to clean items used on a regular basis, like silverware. Similarly, you may want to spruce up decorative pieces. Yet antiques with historic value should be left alone. “Patina is of paramount importance for antique collectors,” says The Antique Sage. “First, it serves to protect an antique from further, undesirable corrosion. Second, it can serve as a hallmark of authenticity. Many collectors want their old items to look old. Cleaning them so they look like new defeats the purpose of owning a fine antique!”
Which antiques should be cleaned, which should not?
If in doubt, it’s a good rule of thumb to leave antiques alone. Bronze and copper are among the materials to avoid cleaning. “Fairly frequently on the Antiques Roadshow, we see a 19th century bronze that has been brought along by an owner in brilliantly bright condition, and then the owner proudly announces that they spent the last day cleaning it to make it bright and shiny,” says Mark Hill. “That brown or green-tinged brown finish is known as ‘patination’ – and it’s key to value. Removing it reduces both the desirability and value of the bronze by well over half.” Likewise, steer clear from shining old coins. While polishes such as beeswax and carnauba wax condition wood, oils can do more harm than good. Additionally, cleaning painted wood can diminish authentic craquelure, or cracking.
“In my opinion, antique silverware and jewelry (excluding watches) are two of the only vintage categories that are alright for the layman to clean, but even here one has to be careful,” The Antique Sage advises. “Organic gemstones like pearls, coral, shell cameos, and amber found in vintage jewelry are very sensitive to common ammonia-based jewelry cleaners.”
When to call the pros
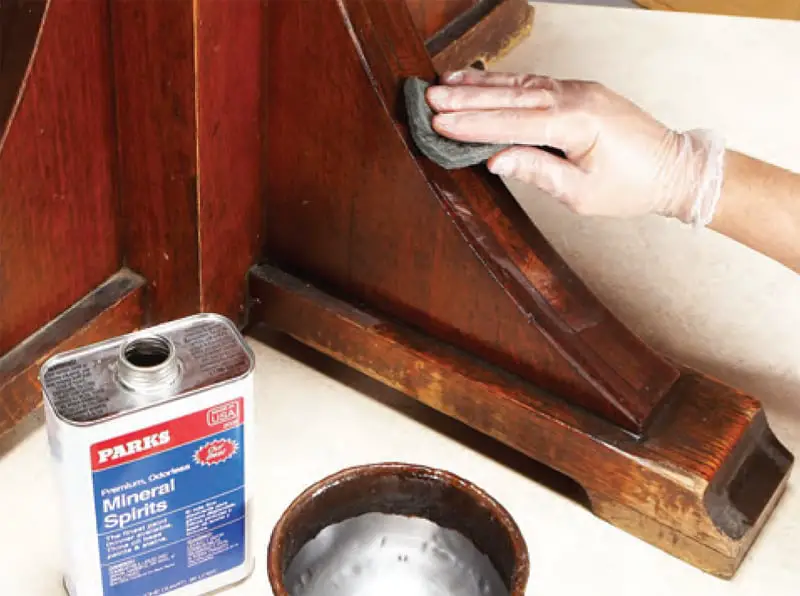
A gentle touch goes a long way in terms of basic upkeep. Some jobs need expert finesse, though. For example, leave antique rugs to professionals. Vacuum and spot clean rugs to prevent spills from setting in, but deep cleanings risk damage to colors and fabrics. The pros are also a better option when abrasives come into play. Steel wool and mineral spirits are accepted at-home tools to remove old wax on wood. However, you may feel more comfortable hiring someone skilled in antique furniture restoration. “If you strongly feel that a piece desperately needs a thorough cleaning, then seek a professional opinion,” The Antique Sage says. “Generally, this is only worthwhile for higher value pieces.”
Cleaning products available online

Many products sold online can accomplish household cleaning tasks. A go-to cream for most metals is Sidol. In general, use it to polish copper, brass and silver. Sidol can also clean chrome and ceramic surfaces such as those on vintage stoves. To treat leather, search for conditioners that nourish and prevent cracking. Several leather conditioners that have been on the market for generations include Pecard Antique Leather Dressing and Belvoir Leather Balsam. Polishes like Minwax and Renaissance Wax can both clean and preserve thirsty-looking antique wood. Common oil-based polishes on the other hand may only move the dust around and leave unwanted residue.
How to clean antiques with homemade recipes
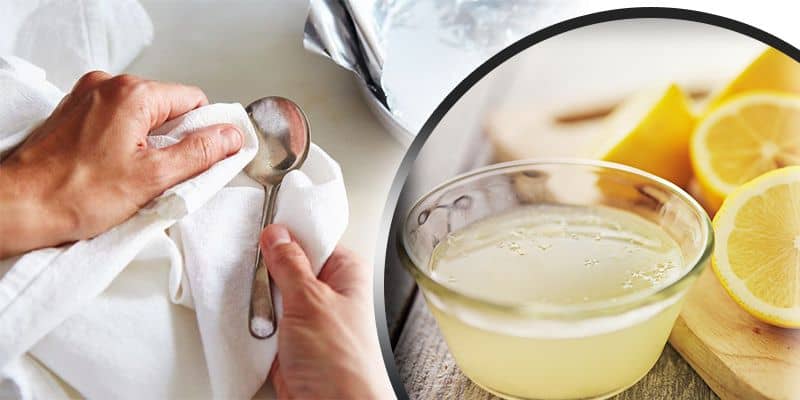
Looking for some easy DIY recipes? Many common household ingredients make effective cleaning solutions. Whip up an aluminum-soda bath to clean a batch of silver. To do so, bring one liter of water, one tablespoon of baking soda, and one piece of aluminum foil to a boil. Soak silverware in the pot until the tarnish disappears, usually within 10 to 15 seconds. Alternatively, polish silver with a dollop of ketchup. Either ketchup or a little squeezed lemon with a pinch of salt cleans brass if going for a bright shine. For leather inlay on tabletops, mix a solution of 1 cup of warm water and 2 to 3 drops of liquid dish detergent or castile soap. Wring the cloth out before wiping the leather. Then remove the dish soap mixture with a clean cloth and warm water before buffing the leather with a dry cloth.
Cleaning antiques is a chore no matter which products you use. In the end, however, using a professional polish might make the task easier.
How to fix mistakes
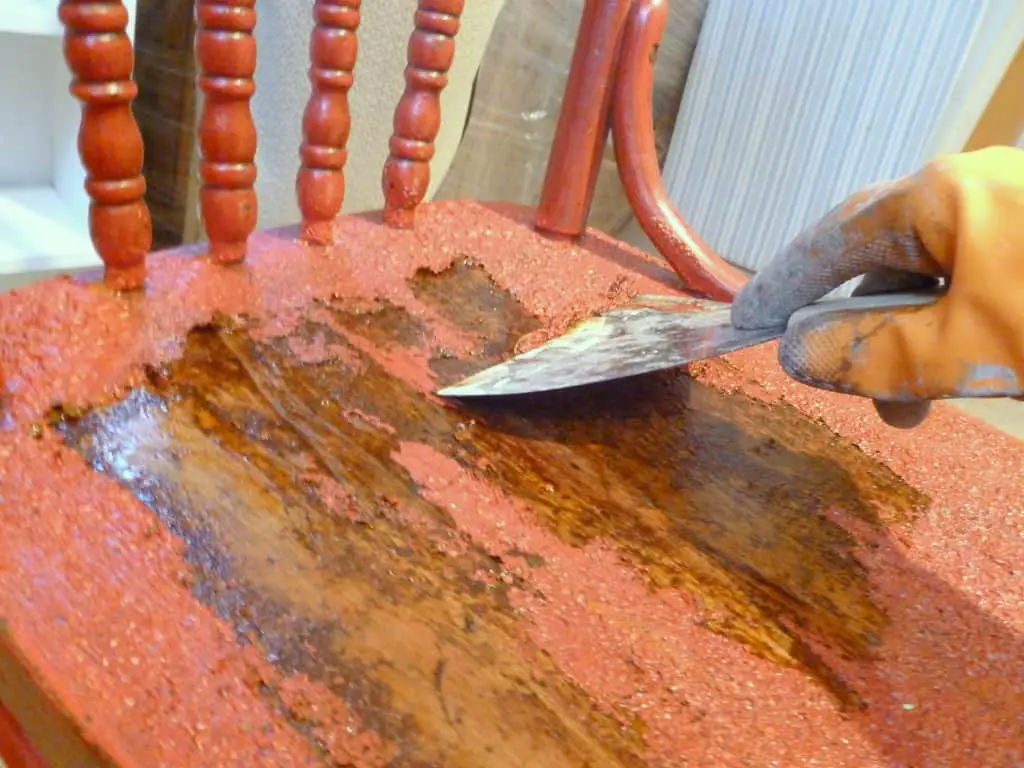
Accidents happen. Before applying any solution, spot-test cleansers on small, concealed places. Some lacquers and stains lighten the finish on furniture. If this happens, dab a color-matched stain marker to the affected area. Burnishing is also a technique to make mistakes less obvious. To do so, rub a piece of denim over the discolored section until the fresh lacquer blends in with the older finish. Tips on how to artificially age or “patinate” may come in handy as a last resort to make decorative items look old again. Essentially, soak metals like brass in cider vinegar and salt to speed up oxidation. While these methods are affordable, the results can be costly and are not advised for authentic antiques. Ultimately, major mishaps will likely require expert antique restoration.
How To Clean Antiques: From theory to practice
Nicolas, our chief editor, had a few antiques laying around in need of some more than deserved tender and loving care. So he decided to put to the test some of the tips, cleaning products, and home-made recipes featured in this article. As “guinea pigs” he used:
- 1x Art Deco Marelli desk fan (cast iron and brass),
- 1x Art Deco cruise ship moneybox (pewter),
- 6x Mid century coat hangers (chromed steel) found in the trash.
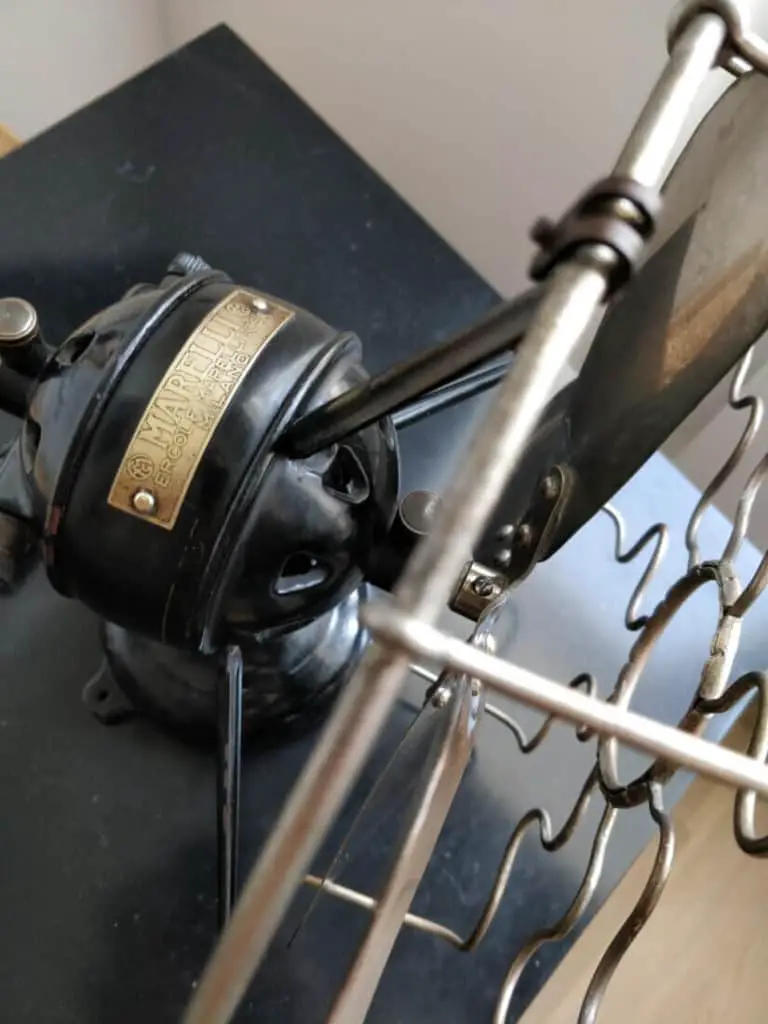
Art Deco Marelli desk fan (cast iron and brass)
Product used: Sidol for brass, copper & bronze + a bucket filled with warm water and vinegar for the safety grid.

Art Deco Marelli desk fan (before cleaning) Art Deco Marelli desk fan (before cleaning)
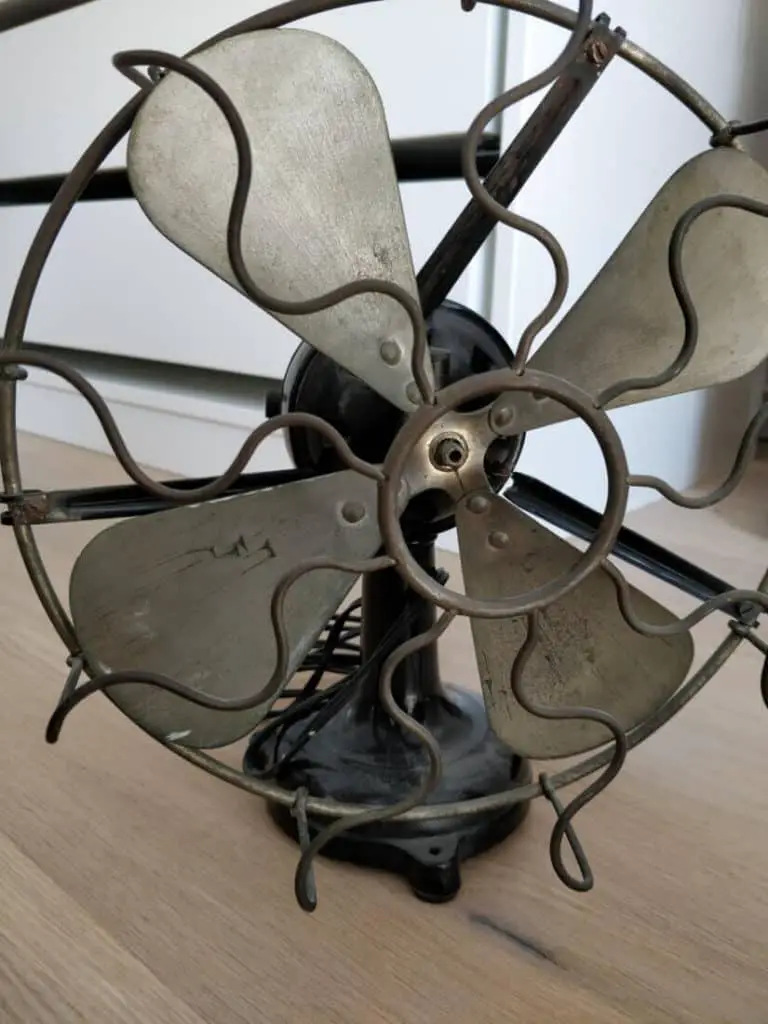
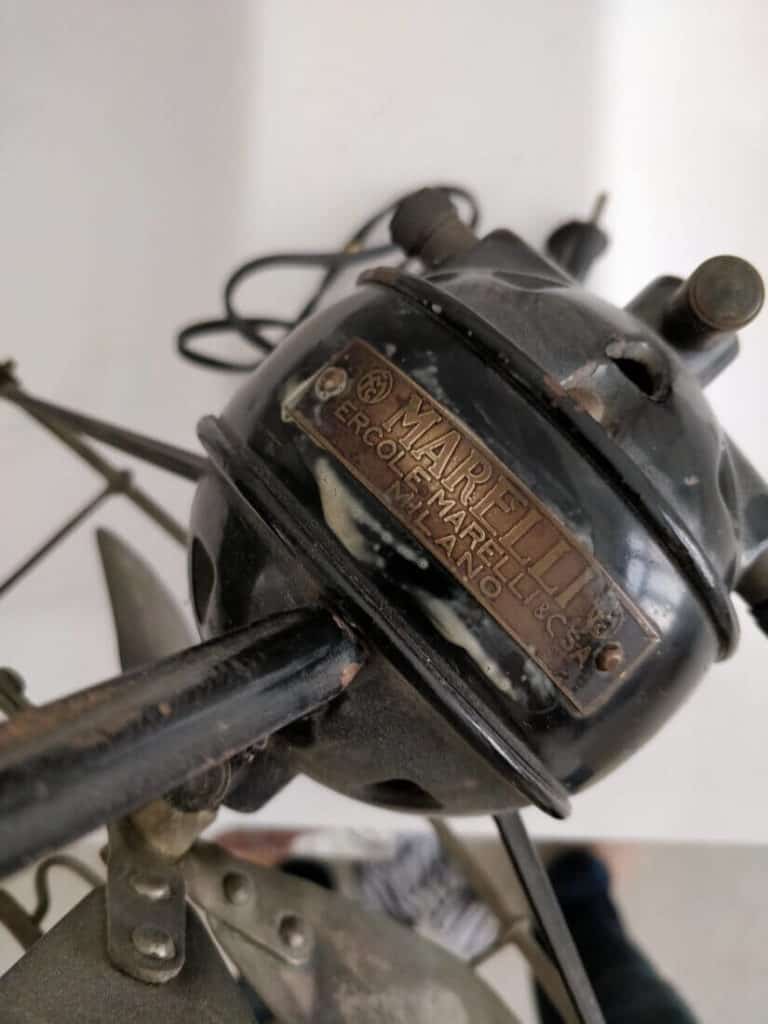
The first part of the job was to dismount all visible parts that could be removed in order to treat them separately. I managed to unscrew the arms holding the safety grid (brass), and I slid the blades (brass) from the central axis. I started by scrubbing the copper tag bearing the name “Marelli” with a cloth and a knob of Sidol. It took approximately two minutes of scrubbing to restore the radiance of yesteryear.
After this first successful test, I was confident that cleaning the blades would be done in a matter of 10 to 15 minutes. It took instead 45 minutes to reach a satisfying result. The reason is that the tag is made of copper (which might react better to the polish), and the blades of the fan are made of brass. I had the same issue with the safety grid which is also made of brass. After 20 minutes of scrubbing, only 15% of the grid was completed. It was time to test a home-made recipe: hot water + vinegar.
After letting the grid soak 20 minutes in this mixture, the rubbing process felt like a walk in the park. And within 15 minutes the cleaning task was fully completed: the grid was cleared of all impurities and oxidation. I used a cloth and some Sidol to polish the grid before mounting it back on the cast-iron structure.
Art Deco Marelli desk fan (after cleaning) Art Deco Marelli desk fan (after cleaning) Art Deco Marelli desk fan (after cleaning) 
Art Deco Marelli desk fan (after cleaning)
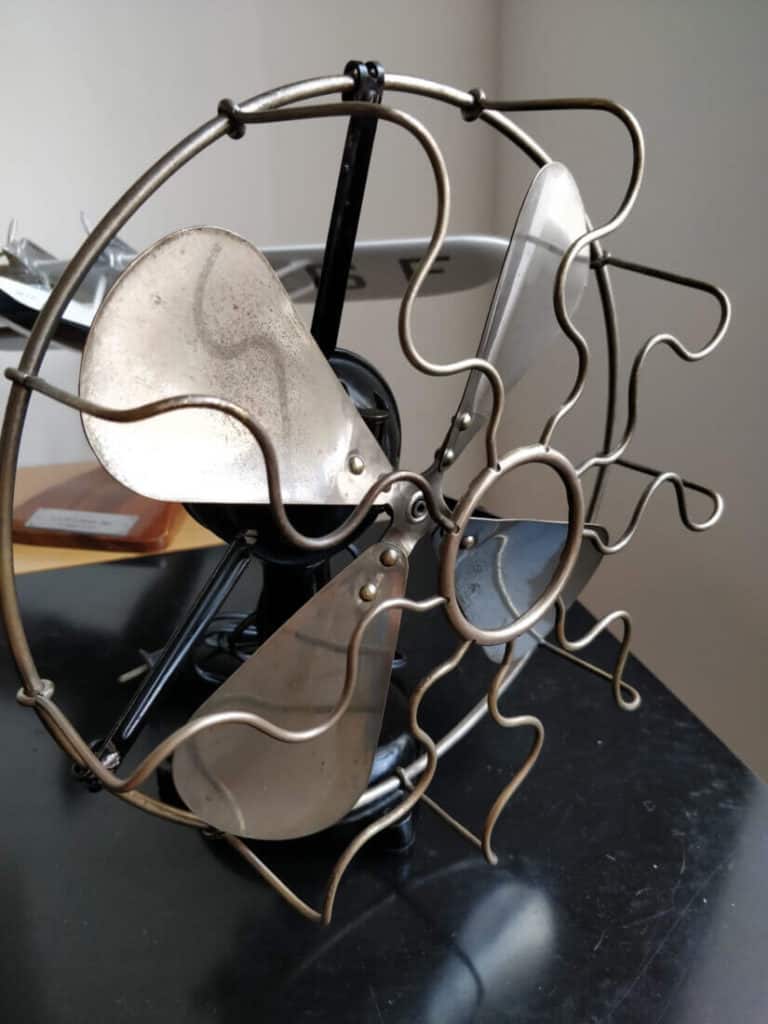
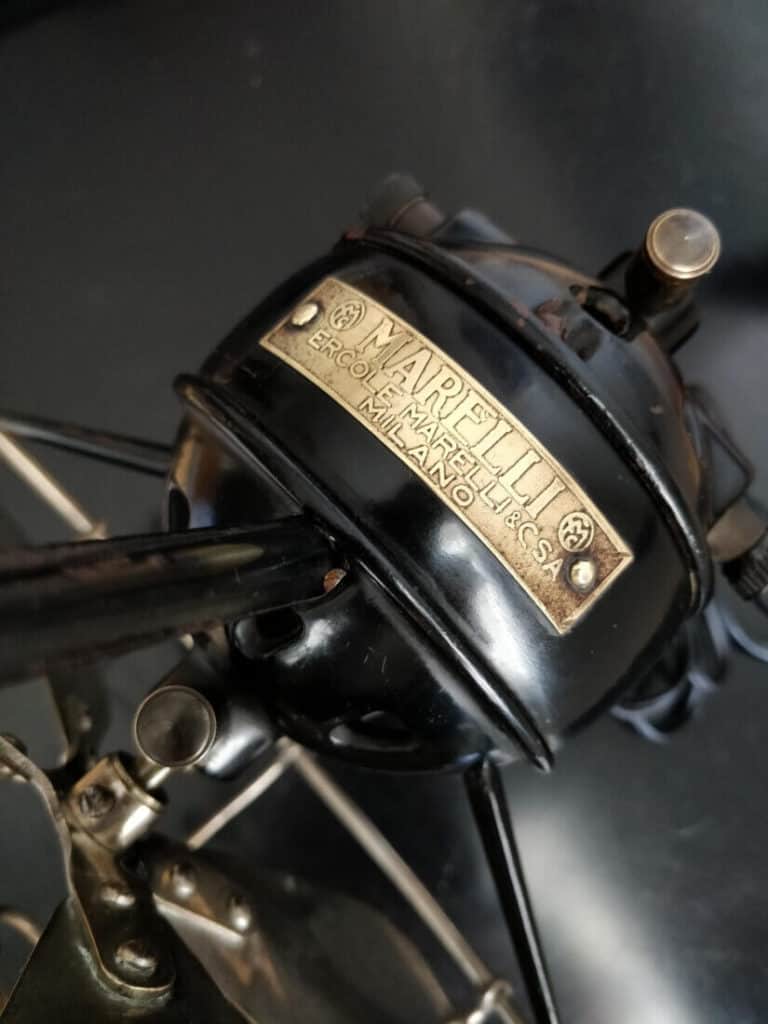
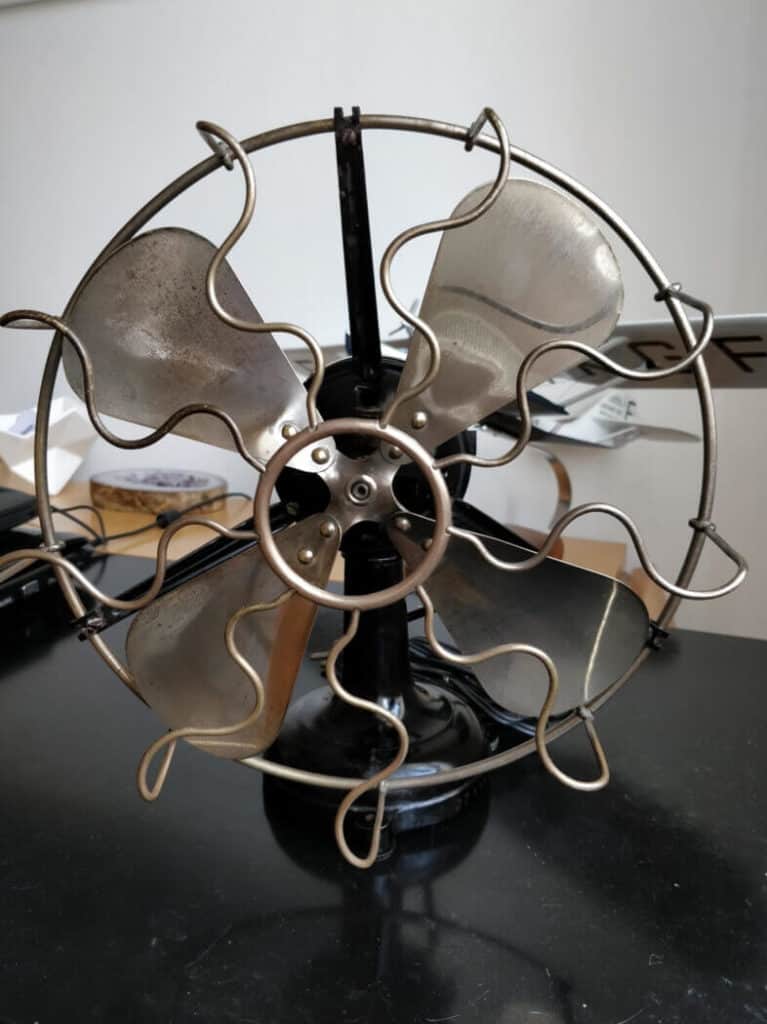
Verdict: after years of having this Art Deco Marelli desk fan in a room, I finally notice it! It looks way better than when I purchased it. I have to admit that I was inspired in this endeavor by antique dealer Le Déchineur by Gaetan de Paix de Coeur who skillfully restored a 1930s Marelli fan.

Art Deco cruise ship moneybox (pewter)
Product used: Sidol for tin, silver & gold
The cleaning process for this Art Deco cruise ship moneybox made of pewter was pretty straightforward (at least in comparison to the Art Deco Marelli desk fan). It was so oxidized, that I was not sure whether this was the original color of the item, or a result of the aging process of pewter.
I decided to start with the bottom part of the moneybox to check first what was below the dark tint of the metal. I put a knob of Sidol for tin, silver & gold on a cloth, and gently rubbed the item. After a few seconds, the part of the cloth in contact with the pewter slowly got covered with dark residue, and the bottom of the moneybox regained its shine.
From here I decided to proceed carefully and work only on one side of the money box (so I could always decide later to expose one or the other side of the cruise ship moneybox. After 20 minutes of rubbing, half of the item was shining like silver. I decided to keep the other half untreated, for educational/comparison purposes.

Art Deco pewter cruise ship moneybox (before cleaning) Art Deco pewter cruise ship moneybox (after cleaning)
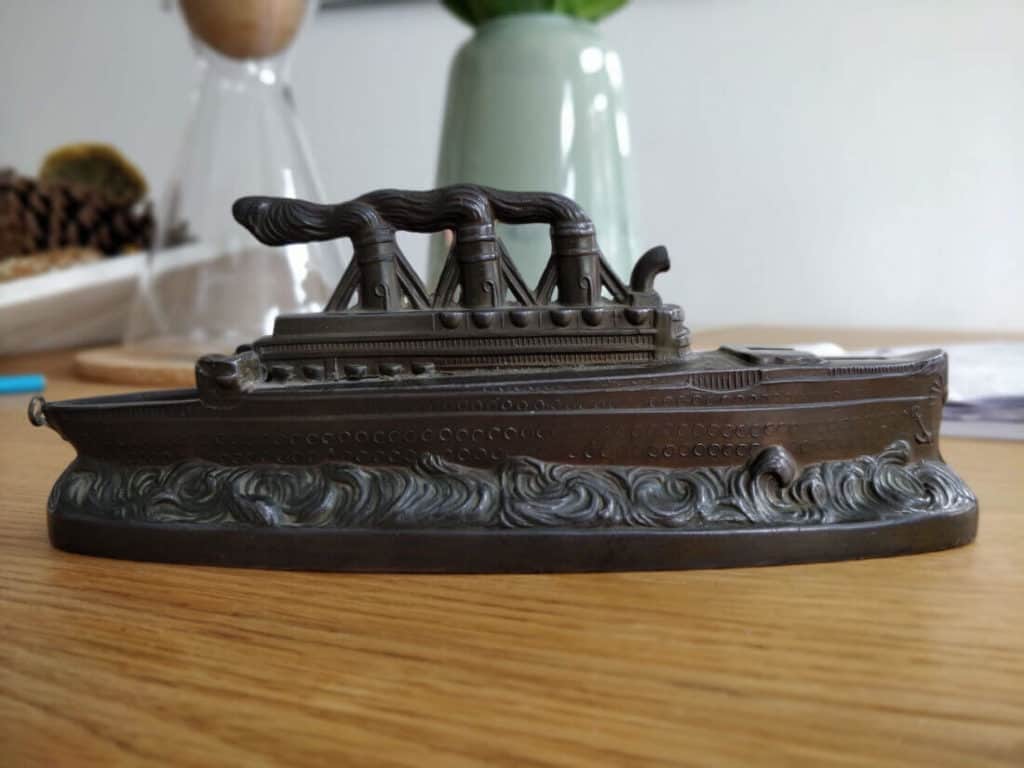
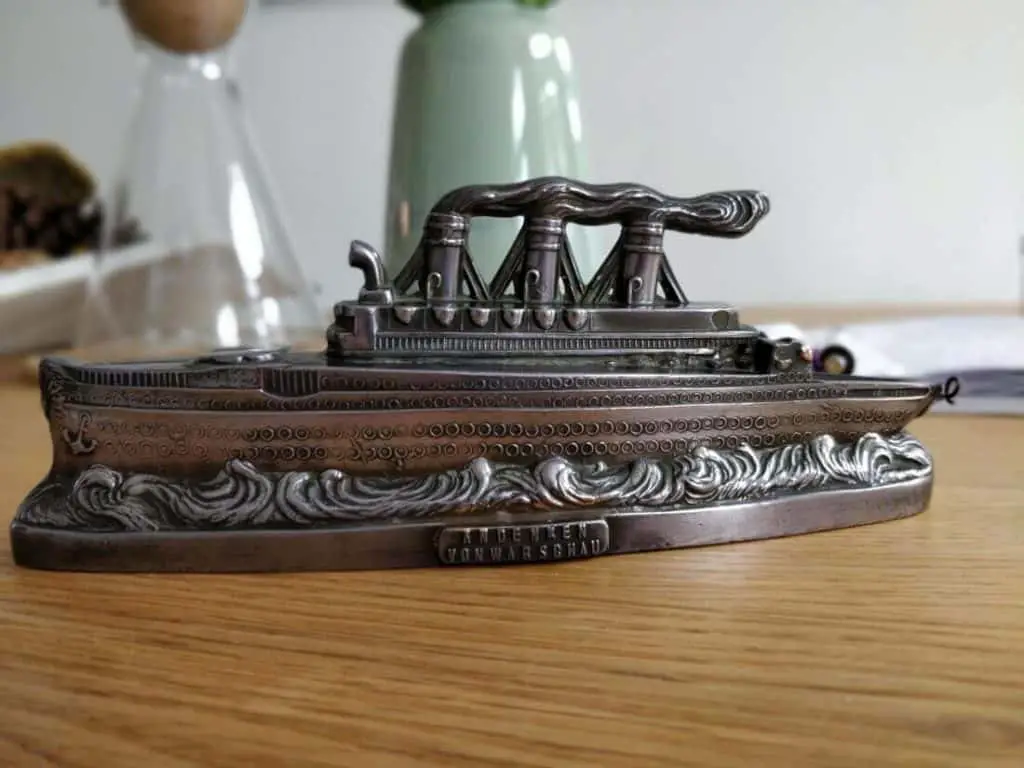
Art Deco pewter cruise ship moneybox (before cleaning) Art Deco pewter cruise ship moneybox (after cleaning)
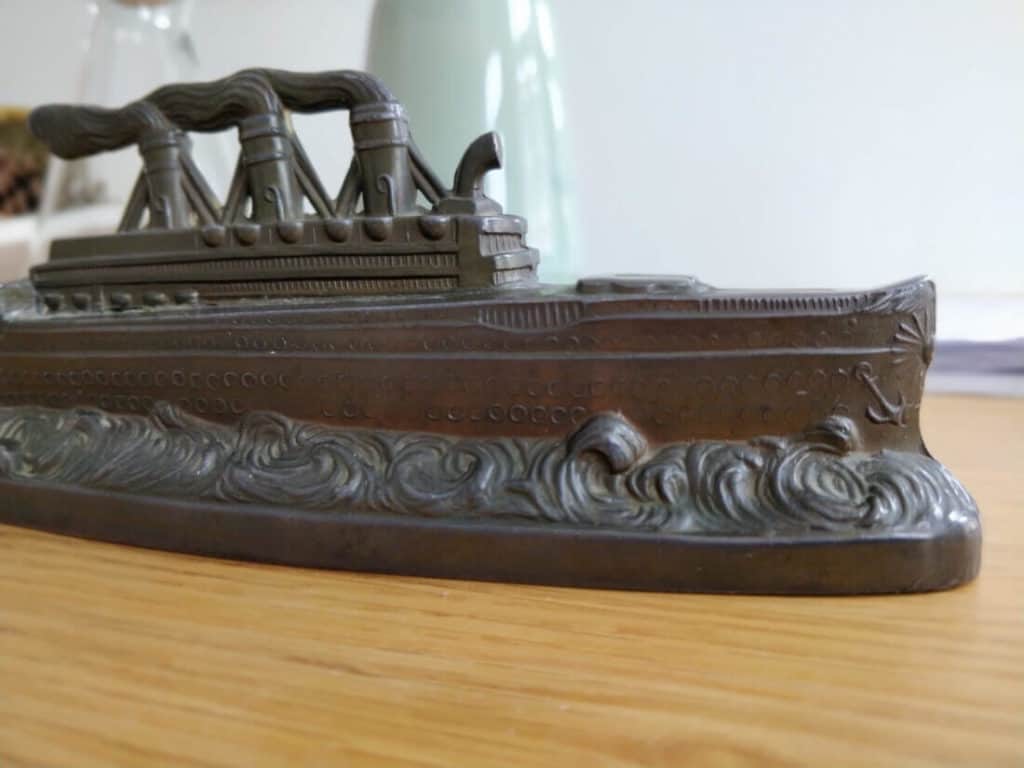
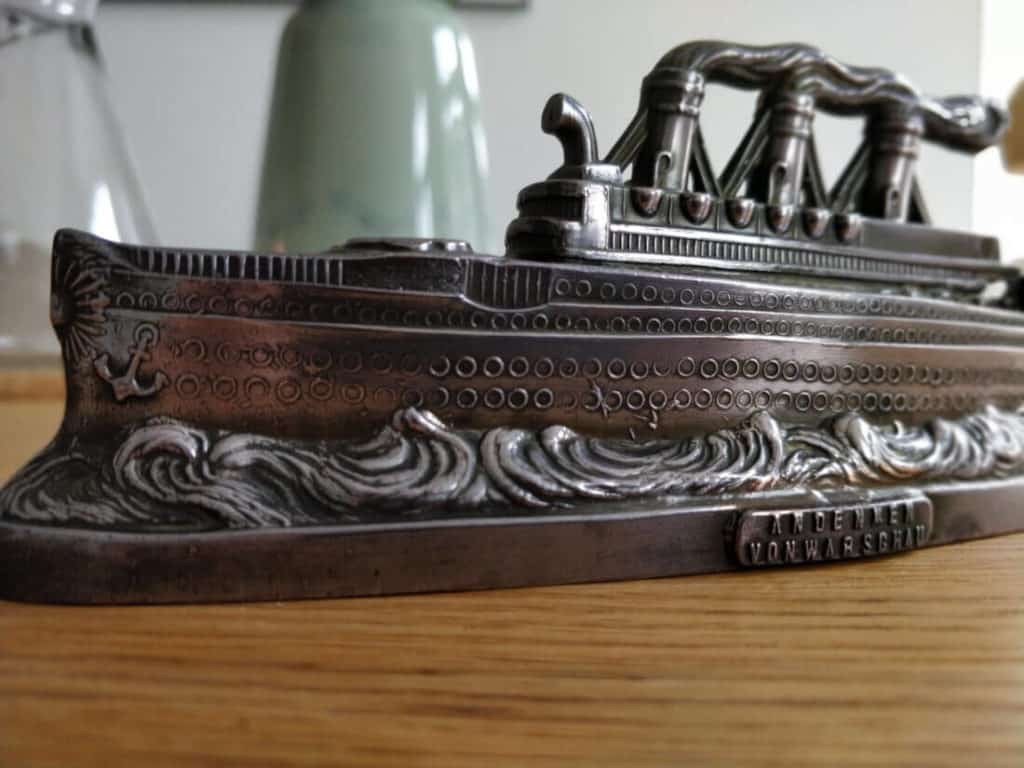
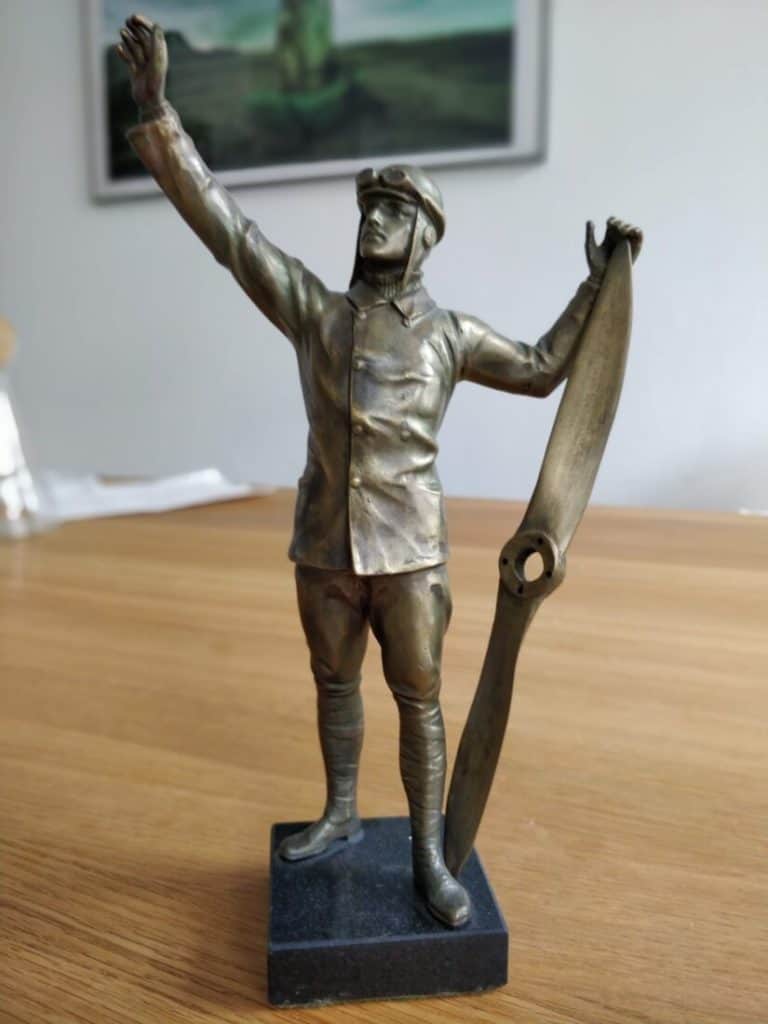
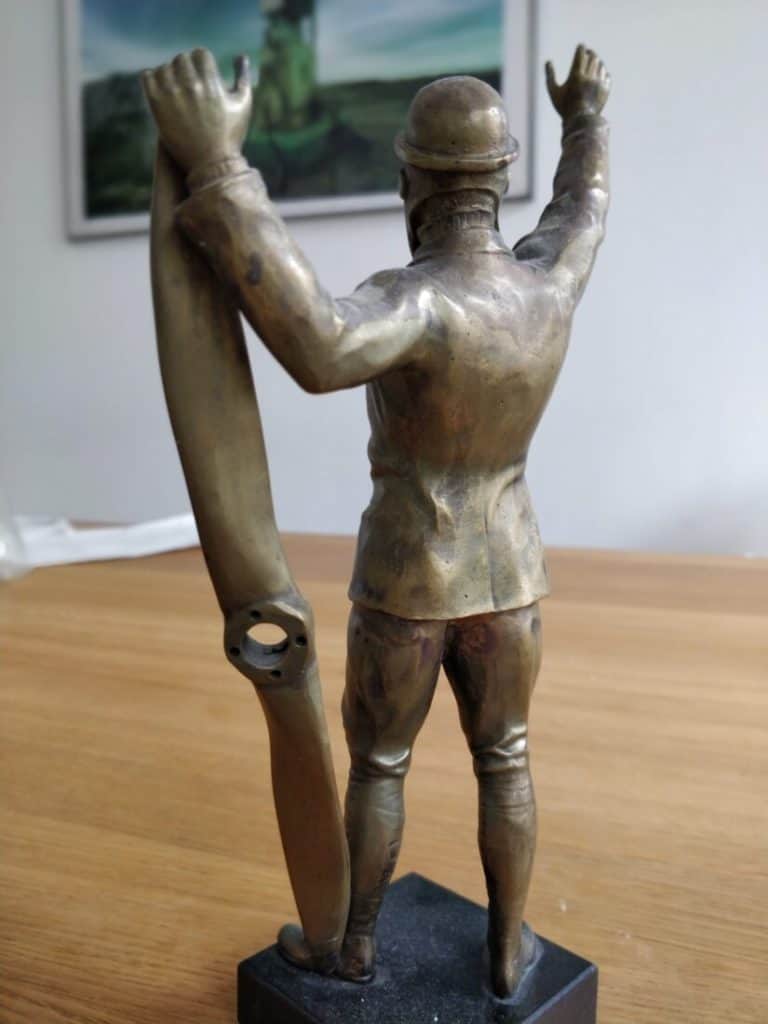
Verdict: I’m still not sure which side of the Art Deco cruise ship moneybox I prefer. At least I discovered what was hiding below this coat of oxidation. I will leave it as it is for now. But retrospectively, I wouldn’t probably clean it again. This somehow discouraged me from cleaning this bronze statue of a German WWI pilot with propeller (material: quality bronze and brass alloy), which was a great decision.
To polish or not to polish, that is the question: Art Deco bronze statue of a German WWI pilot with propeller (left untouched) To polish or not to polish, that is the question: Art Deco bronze statue of a German WWI pilot with propeller (left untouched)
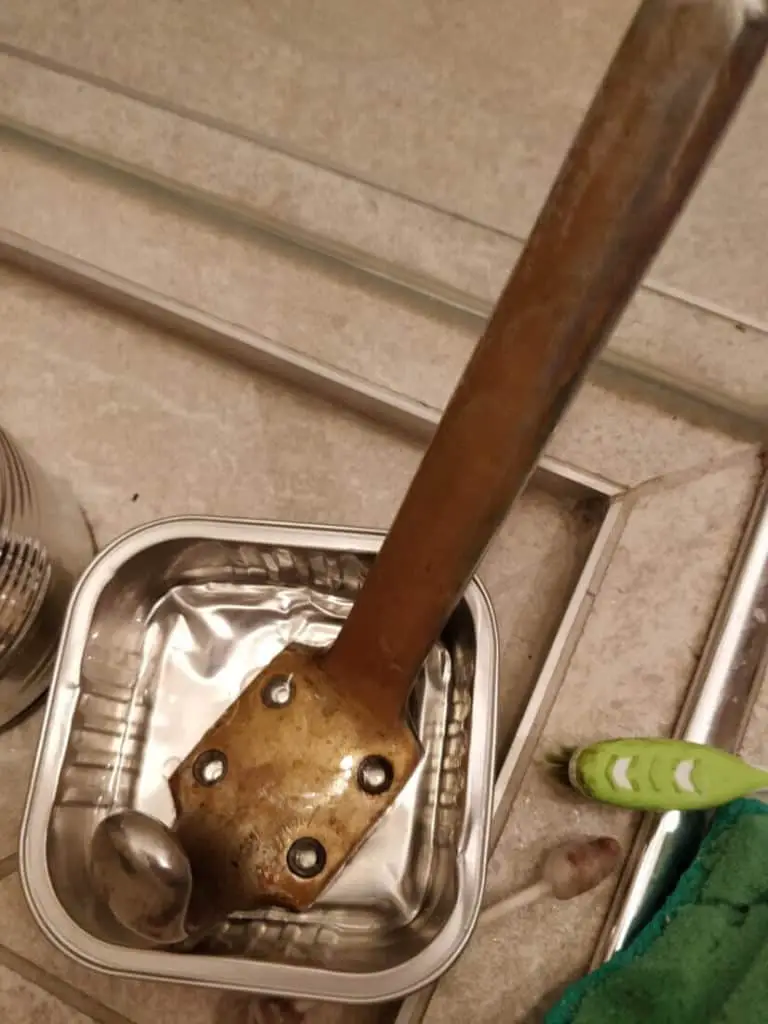
Mid-century coat hangers (chromed steel) found in the trash
Product used: Turpentine + Sidol for chrome
I found six coast hanger mounted on a board in the trash. After a lengthy disassembly process (done on-site), I headed home with my new finds. Upon inspection, these coat hangers were in perfect condition, and just needed a bit of cleaning.
After letting them soak in a bucket with a mix of hot water and disinfectant, I removed the remaining traces of paint and lacquer with turpentine. I cleaned them again with clean water, dried them, and rubbed each coat hanger with a cloth and a knob of Sidol for Chrome to remove what appeared to be a yellow layer of dirt. Once again this polishing paste showed how effective it is, as, after a few seconds of rubbing, each coat hangers got its original shine back. And that was it! Six mid-century coat hangers in now mint condition, for nothing.

Mid century coat hanger (before cleaning) Mid century coat hanger (before cleaning) Mid century coat hanger (after cleaning) Mid century coat hanger (after cleaning)
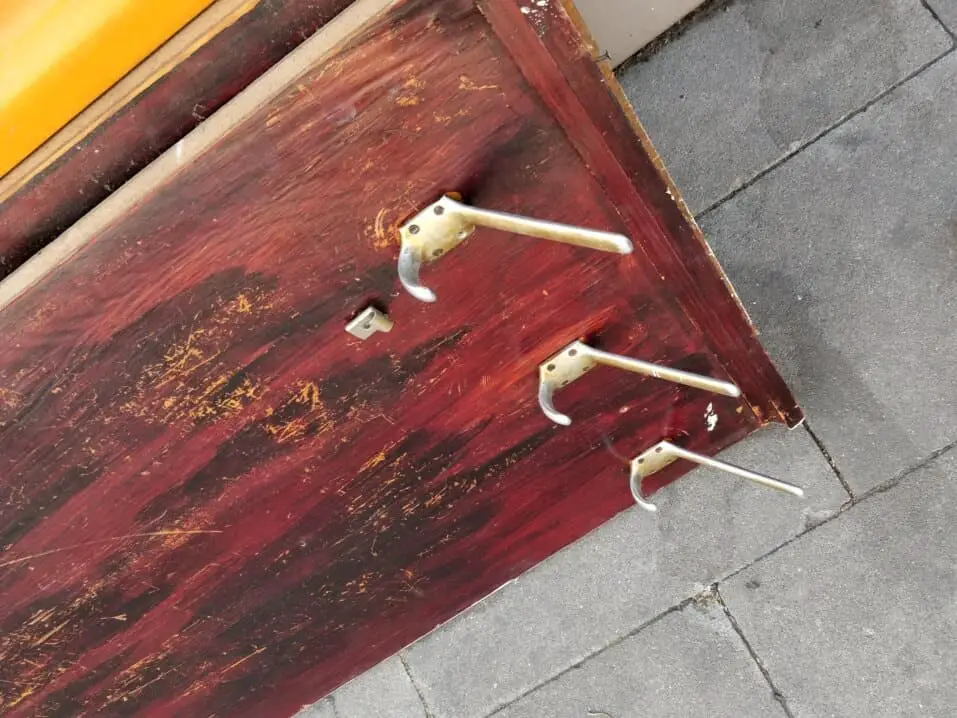
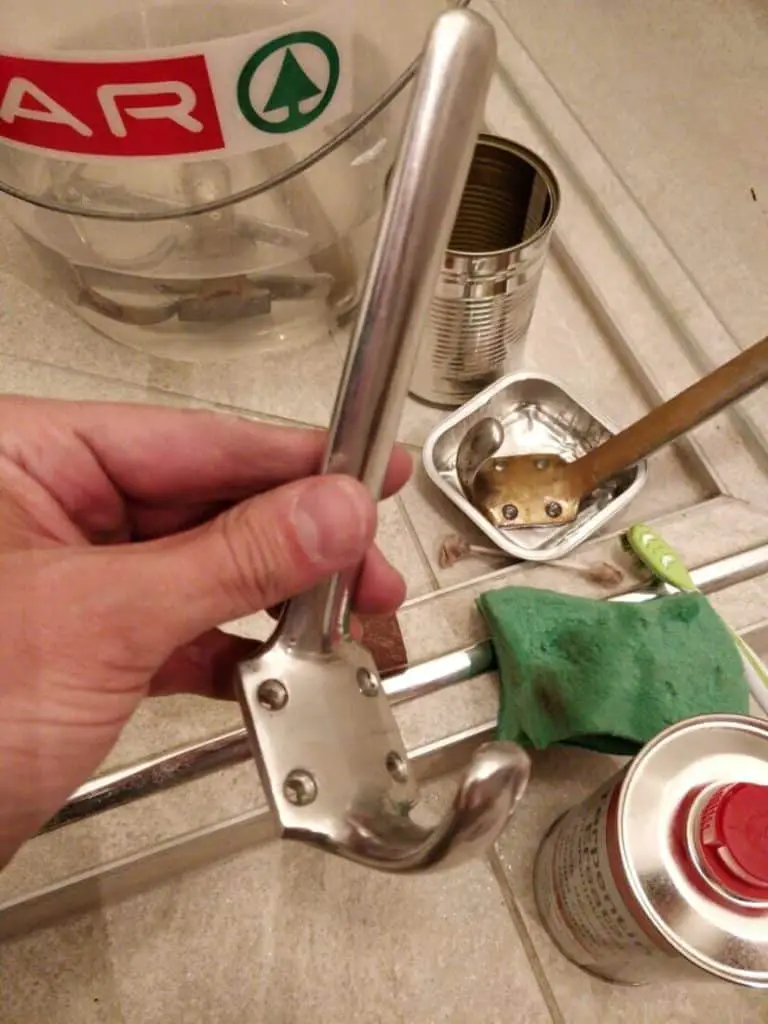
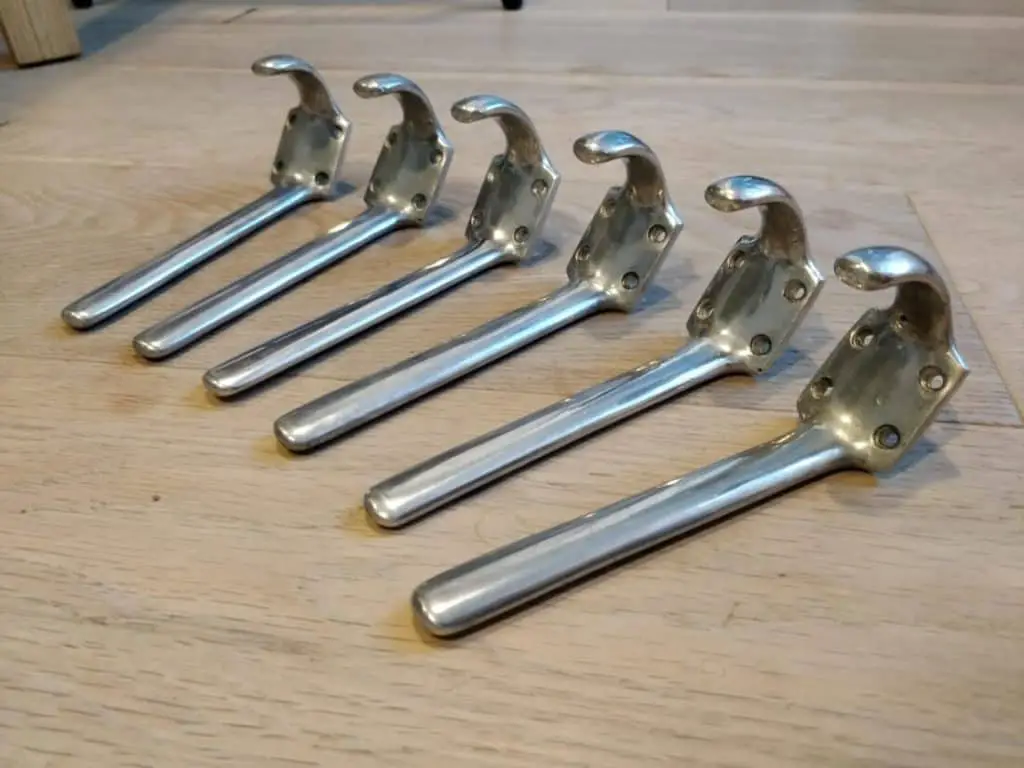
Verdict: I’m very happy with the time/efficiency ratio of this restoration. When I first saw in which condition were the coat hanger while they were still mounted on the wooden board, I wasn’t sure if the gain was worth the amount of work. But in the end, it was all worth it: the cleaning process was seamless, and the end product exceeded my expectations.